Choosing Better Paint Colors

Painting can be a great way to customize your house and make it into a home. Whether you’re just adding a splash of color or redoing entire rooms to match your favorites, a fresh coat of paint is a great way to take a home that you bought and really make it yours. Unfortunately, not everyone is great at picking the best colors for their home. After some unfortunate paint jobs, some homeowners may even wonder why they were allowed to go near a paint store at all. This doesn’t have to be the case, however.

There are a number of things that you can do to find paint colors that better match your home. You can pick up paint swatches, get some small cans to test in different colors, or even use software to see how different colors will look in your rooms. The big thing is making sure that you know how to take what you’ve learned and make your rooms look their best. Here are a few tips that may help with that.

Things to Consider

There are several things that you should think about before picking out a specific paint. One of the big considerations that many people overlook is stopping to look at the colors of your existing décor. Even if you don’t have a specific theme to your furniture and decorations, there may be predominant colors that you should keep in mind when choosing paint. Even thinking about whether most of the décor is on the darker side or the lighter side can affect your color decision.

You should also consider the type of finish you want on your walls. Depending on the paint options you’re considering, you might find colors in everything from flat and eggshell to the high-gloss paints that are typically used for trim and accents. The finish affects the shininess or flatness of the colors and can produce significantly different effects with similar colors. It can also affect how resistant the paint is to stains and dirt, with flatter colors being harder to clean while higher sheen paints are easier.

Finding the Right Color

There are a few considerations to be mindful of when it comes to actually choosing a color, too. Ideally, you should pick up swatches of multiple colors that you like and bring them home to see how each one looks with your lighting and home environment. Once you’ve narrowed it down to a few, get a few samples of the colors you like the most and actually put some paint on the walls to see how each one looks once dried. Don’t put these sample bits too close together, though, as it might be harder to tell which you actually like when you’re distracted by a number of samples right next to each other. Larger areas are better than small spots, and if you’re doing the entire room, you should try different colors on different walls.

Bring Your Walls to Life

When it comes time to paint, it may be tempting to just grab a brush or roller and go for it. That may not be the best approach, however. First you should make sure that you have everything that you need, including enough paint to cover the entire area and tools of high enough quality that they aren’t going to leave streaks or fuzz in your paint as you go. You should also go over your plans one last time, especially if you’re doing one wall in a different color as an offset or otherwise trying to use accent colors. A bit of prep time before you actually start painting can make a huge difference in the end result.

Of course, if you’re concerned about the scope of the job, you can always hire professional painters to come in and get the job done. This can take a lot of the stress off you, and they can usually offer suggestions on colors, textures, and other elements that you might not have even considered.

Home Renovation on a Budget — You Got This!

Are you tired of looking at the drabby paint on your walls, the outdated cabinets, worn furniture, and stained carpets? Your home is overdue to be remodeled, which is on your wish list. However, you are afraid of what the cost might be. Unless you want a major overhaul, you can still spruce up your home and improve its appearance and functionality without going broke. The following are some budget-friendly ideas for renovating different rooms of your home.

Refurbish, Reupholster, and Refinish

You can minimize the cost with these suggestions — whether you want to change cabinets, furniture, flooring, or curtains. For cabinets in fairly good condition, you can opt to repaint, reface with a contemporary style, or add new doors. For furniture and curtains, trade the worn-out, faded material on your couches and chairs with a different texture and color. You can save additional money by using the same curtain rods and rings and finding fabric you can sew yourself. Refinish or recoat hardwood floors without replacing them. There are peel-and-stick flooring options that you can apply over the existing surface. The old carpeting can be removed to reveal useable hardware flooring you can restore cheaply.

Renew Kitchen Surfaces and Appliances

Usually, the messiest and grimiest area is where you cook and eat. Periodically you will need to replace appliances and refresh the overall appearance. There are many materials available to fit your budget. For essentials like refrigerators, stoves, and dishwashers, it’s possible to replace them inexpensively with package offers or discounts on multiple purchases. You can also learn how to install an appliance to save an extra $100 to $500. If your oven is new or still in good condition, all you may need is to add a new backsplash. You may also want to consider new countertops since they are one of the most worked surfaces. Check on deals with your local store and tile companies.

Create More Open Space Without Increasing the Size

Increase efficiency without knocking out a wall to expand your home. You can replace bulky cabinetry and large shelves with vertical cabinets with pull-out drawers wide enough to store racks for pantry items. Need a kitchen island to prep meals? You can use a simple stand-alone table and add wheels for easy moveability.

Declutter, Add Color, Style, and Lighting

Improve the livability of smaller rooms, such as your bathroom, by adding a storage closet, vanity, or medicine cabinet. Peel and stick wallpaper can save time and labor if you’re not ready to paint. Add new hardware to give your room more of a modern flair, such as updating knobs and drawer handles. Save on cost by finding recycled fixtures. Brighten a windowless room with a light tube that funnels in natural light. Add wainscoting trim to dull walls and ceilings to add texture and detail.

A simple, cost-effective renovation can breathe new life into your living space and bring you a renewed sense of accomplishment without financial hardship. From your biggest, most lived-in rooms to your tucked-away areas, there is always an affordable solution to get your home in tip-top shape again.

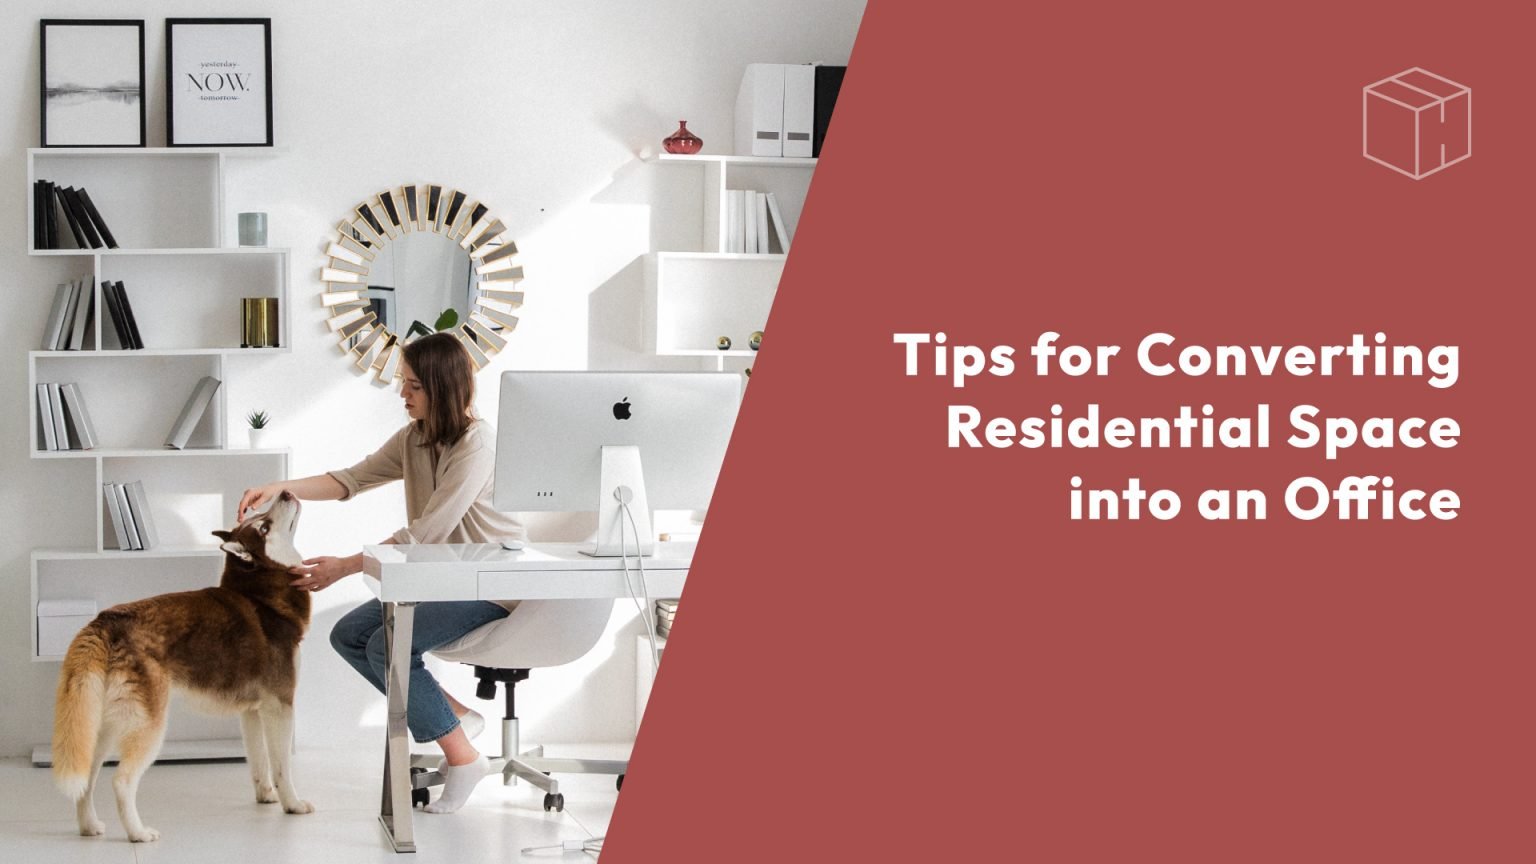
Tips for Creating a Home Office

A large percentage of the workforce now is working from home. A devoted area that is free from personal distractions such as family and pets is necessary to concentrate on work tasks. If you want to create space in your home for an office but can’t afford an elaborate renovation, think about converting a spare room or corner of the house with these practical modifications.

choose a room

Choose a room—Decide which room or corner of one will make the best office space. Choose one with a window if you enjoy looking out but check that it is free from outdoor noise.

clean and declutter

Clean out and declutter—Keep only the items you will use in your office. Paint the room a color that suits your mood. Decide on a hard floor or carpet.
Place Furniture convenient to outlets—Consider placing important equipment such as lamps, TVs, computers, and printers near electrical sources for easy plug-in. Make sure you have access to cable and internet connections. Invest in fast, reliable service. Buy a WiFi extender if you need to increase the network signal.

choose furniture

Choose your Furniture and accessories—Decide what you need to make your office function, such as a phone, computer, printer, filing cabinet, etc. Measure the size of a desk, bookshelves, and other items to ascertain the proper fit. Buy only the size you need for the equipment you have. Start with a big piece so you have room to maneuver it and put it together if needed. Buy an ergonomic chair to support your back during long hours of sitting.

make it yours

Hang wall décor—Hanging whiteboards, bulletin boards, family pictures, certificates, awards, and motivational quotes will help organize your office and make you feel good. Hang and display artwork that reflects your style, personality, and interests.

promote a healthy environment

Promote health and energy efficiency—Add plants for a healthy work environment and purchase an electronic thermostat to control temperature output.
Try it on for size—Make sure you are comfortable with your arrangement and that all electronics function properly. Sit at your desk for a while and make any necessary changes before you start work.

If your home is your castle, your home office is a big part of that. Design it with attention to the comfort and functionality needed to get down to business. With these suggestions for change, you can convert a residential room or area into a productive office domain.

Restoring Wood Furniture

Among many cherished items in our homes, vintage wood furniture is a favorite of many. Whether we cherish them for monetary or sentimental value, we want to preserve and protect these pieces for however long we can. However, these antiques and family heirlooms can become worn and damaged with age and neglect. Our best option is to restore our old furniture items by learning how to clean, repair, and refinish them. With the following guidelines and steps, you can bring out the natural beauty of your vintage furniture lost over time and add character to your home.

Research and Examine—Assess the extent of wear and tear. If the item is a valuable antique, you should consult a restoration specialist before restoring it yourself. You also want to consider its age and quality. Intricacies, such as detailing through paint and gilding, may require an artful hand.

Know your goals and project length— Decide how you want your piece to coordinate with other décor and furnishings in your home. Get an idea of the true grain color before you restore it to ensure it will match different pieces. Find a spot on the furniture that’s been protected from everyday wear so that you will have a frame of reference. If you determine that the restoration process will be lengthy, decide whether you will have enough time to accomplish it.

Establish a budget—If the wood needs repair, determine if it can be fixed inexpensively. If so, how much are you willing to spend? Will the repair cost you less than buying a new item?

Choose the appropriate products—It will depend on whether you want to restore the luster or repair an imperfection such as a split, hole, scratch, or dent. If you’re going to clean and shine up the wood, start with a simple cleaning solution to remove dirt and grime build-up. For matte surfaces, you can mix one part vinegar with one part olive or mineral oil and apply a thin layer before buffing. Another method is diluted Ivory dish soap with a light sponge or sugar soap and warm water. Thoroughly rinse and towel dry completely. To restore color and sheen, use a top-quality wax that will yield a glossy and resilient finish. Use beeswax, linseed oil, or other products with natural ingredients specially formulated to conceal blemishes and preserve old wood. Test all products in a small area. Consider stripping the old finish if the surface has not improved or is marred. If you want to remove old wax without sanding, you can use a special polish remover before applying the new wax.

Stripping and repairing—For stripping, you can use an abrasive, sanding implement, or a chemical stripper. Both can be messy so take precautions to protect your floor and nearby furniture. You can wet the sandpaper to minimize dust and ensure the room you work in is well-ventilated. Use hard wax for scratches, dents, and holes, and fix cracks with colored wax fill sticks. Use wood glue for splits. After applying glue, use a clamp to tighten the wood together, wipe off excess adhesive with a damp sponge, and let dry overnight. For missing wood, use a wood epoxy that you can sand and shape after it is hardened. Stain it to blend with the other wood.

Safety and preventative measures– When using chemical restoratives, protect yourself against fumes and contact with skin by wearing goggles or a mask, gloves, and long sleeves. Ventilate the room before you begin restoring. Prevent your wood from drying and warping by keeping it away from radiators and fires. Do not place wood furniture beneath a window that can be bleached by the sun.
Your vintage furniture and other family heirlooms are precious keepsakes. You’ve enjoyed them for so long and should be able to continue enjoying them for years to come with the right care. Avoid replacing them when worn and damaged by following these guidelines and do-it-yourself remedies. Always follow product directions and keep a how-to guide handy. Consider consultation with a professional if you are uncertain how to restore a valuable antique.

Interior Design Trends for 2023

Since the pandemic’s beginning, we have been spending more time in our homes. Therefore, the trend that designers predict for next year is associated with solitude and the enjoyment of being in the home environment. Designs have begun to reflect comfort, stability, and simplicity. However, there is also a post-pandemic re-awakening in which people wish to explore their individualism with an emphasis on bold patterns, materials, and colors. While going for the maximum effect, there is also a tendency to be minimal with space and to bring nature and sustainability into the home. The following is a wide spectrum of home decorating and design trends that professional designers predict we will see more of due to an ever-changing shift in attitudes about home and our relationship to it.

Eco-Friendly

Eco-friendly home—With the emphasis on environmental conservation, homeowners are more interested in using renewable materials and finding more efficient ways to heat and cool their homes. Materials such as wool, cotton, bamboo, and cork are preferred over acrylic with flooring, furniture, textiles, and building materials. They also want their homes to have smarter and more efficient appliances. Many homes will be built with increasing emphasis on sustainable supplies, natural airflow, maximum daylight, and natural ways to obtain energy for warmth and cooling.

Holistic Approach

Holistic approach—The design considers the mind and body. The focus is on creating an environment that makes the homeowner feel happy, healthy, and productive. Warmer wood tones in furniture and fabrics versus dark or stark, white surfaces are becoming more synonymous with comfort and well-being. Open floor plans with a free flow of movement, such as the practice of Japanese feng shui, encourage tranquility and peace of mind through decluttering. Open shelving and under-counter storage, as opposed to built-in cabinetry, are some illustrations. Add enhanced natural lighting, organic implements, and warm, earthy colors, bringing the natural world into your home.

Ornate is in

Ornate is also in—On the other end of the spectrum, home decorators crave the bright and the bold. While warm, gentle furnishings and decorum are on the up, so are vivid colors and geometric patterns. The art deco style has made a comeback and is increasingly popular. While one group favors the unassuming mauves and mustards, colors like raspberry, ultramarine blue, and lavender are popular pleasers for those who want their living space to make a statement. Stripes and plaid are among the most sought-after patterns for wallpaper, textiles, paint, floor covering, and other furnishings. In addition to vibrant hues, the glossy and the elaborate are making an upward trend. Doorway arches, ceramic lamps, sweeping curtains, unusual sculptures, lavish chandeliers, marble slabs, and fancy etchings provide an old-world yet sophisticated charm.
Creating more space—When Covid forced us to shelter in place, many of us invented new areas for activities in our homes or established more room by re-purposing interiors. Many homeowners are using one room for multiple functions. The kitchen is a perfect example of a space often converted into an entertainment hub or a homework corner. Dining rooms, guest bedrooms, and closets become home offices, art studios, craft rooms, or workout areas. A solution for previously underused areas of the home came about out of necessity.

With the world a wild and unpredictable place, many homeowners are looking for new ways to redesign and decorate their homes to make a healthy and happy haven to escape or simply get greater enjoyment out of staying home.

Tips for Flexible Spaces for Kids

Whether you’re looking to design a bedroom, a nursery, or a playroom, creating a unique space for your children is usually a bigger job than you expect. This is especially true if you want to come up with something that will stand the test of time. The wants and needs of your children will change as they get bigger, and if you don’t account for this, then sooner or later that “perfect” room you designed for your little one will be outdated and possibly even unwanted. Is there anything that you can do other than completely redesign your kids’ rooms every few years?

Fortunately, the answer is yes. By taking the way that children’s needs change over time into account, you can come up with more flexible designs that are easier to adapt even as your child’s interests shift. There will still be periodic changes that have to be made, of course, but this will keep you from having to start from the ground up each time. Here are a few things to keep in mind to help you create some of these more flexible spaces for your kids.

Start Simple

When coming up with the initial design for your child’s bedroom or playroom, it’s a good idea to take something of a minimalist approach to your design. Try to figure out what the absolute essentials are, then see if there is an age-agnostic way to approach them. Add color to the room, but skew a bit more toward light or neutral shades instead of going with brighter or more extreme colors that your child may grow to dislike.

Invest in a few key furniture items that can be repurposed over time instead of buying specialty pieces that will only be used for a short while. Use colored rugs and other removable accents instead of going for changing the carpeting. Your goal is to create a simple space that has a lot of potential, so that as your child’s interests change, you’ll have a base to move back toward and adapt the room from.

Customize the Little Things

Once you have a base design for your child’s room, it’s time to start customizing it to make it appear much more in line with their interests. This is where you can get creative and really try to match the room to your child. Lamps, posters, decorative items, and more can go a long way toward customizing the space while still being relatively easy to remove and replace if your child loses interest over time.

This is also a good time to consider painting furniture items such as desks and dressers. While this may not always be an option, most of the time it’s not that big of a deal to add a coat of paint to simple furniture items to help them better match the look of a room. By painting these accent pieces to match the overall layout of the room, you can make a notable change to the space that can be redone or updated in the future as needed.

Designing with Kids

As your children grow, be sure to get their input periodically so that you can make additional changes that actually align with their interests. This doesn’t mean that you have to rush out and buy everything that your child wants, of course; use these periodic chats to gauge how happy they are with their room, what sort of changes they might be interested in, and if there are any pieces of furniture or decorations that they seem to be outgrowing. The nature of their room is going to change over time, so make sure that they are a part of the conversation on how it needs to change.

Give Your Fireplace a Facelift!

If you have a fireplace in your house, it’s going to draw the attention of anyone who walks into the room where it’s located. This is fine if you want your fireplace to be a focal point, but if it’s less than impressive, you might want your guests looking pretty much anywhere else. Even if there aren’t any significant issues with your fireplace, you may not like the way that it fits in with the rest of your furnishings. Is there anything that you can do?

Yes, actually, there are several ways that you can spruce up your fireplace and get it in the sort of shape that will have you wanting to show it off. While some options may depend on the type of fireplace you have and how you decorate the surrounding room, you should be able to find some way to improve the look of your fireplace that fits your specific situation.

Updating Your Surround

One way that you can really change the look of your fireplace is to make changes to the surrounding materials to update the overall look of the fireplace area. Many fireplaces have a brick surround immediately around the opening, and this brickwork can be covered with tile to significantly change the appearance of your fireplace. Textured and patterned tiles are especially useful when trying to change the look of your fireplace surround. Updates can be made to the tile inside the fireplace as well, so long as appropriately heat-safe and fire-safe materials are used.

Wood molding and other decorative accents can be placed around the surround as well to further change the look of the fireplace exterior. These can help contain the look of the surround and better blend it with the overall look of your room. These accents can also be used to give the fireplace a mantle or other decorative flourishes that it was missing before.

Revitalizing the Room

Making changes to the area immediately around your fireplace isn’t the only way to bring the fireplace front and center in the room. Changes can be made to the rest of the room, which helps to blend the fireplace with the overall decorative design, bringing out colors and textures that might otherwise have seemed out of place. Furniture and decorative items can also be shifted to make them focus more on the fireplace as a central point in the room, allowing guests to face the fireplace and bask in its glow instead of it being hidden in the apparent back of the room.

Other changes can also make a big difference in how well your fireplace fits into the room. Placing a large painting or other decorative item in the wall space above the fireplace helps to make the fireplace seem like a decorative choice. Upgrading your fireplace screen to be more appealing (or adding a decorative screen if you don’t have one) can have a similar effect, while also providing an important measure of safety during periods when your fireplace is in use.

Total Fireplace Makeovers

The suggestions thus far largely assume that your fireplace is in good condition and simply needs some touching up to better fit in. If your fireplace has damaged bricks or tiles, faulty hardware, or is otherwise in need of maintenance, a bit more work is required to revitalize it. Many of the same considerations apply, though, and while you’re getting it repaired, you can make choices that will improve its overall aesthetic while also making it safe.

The Color of the Year Has Been Announced!

You may not be aware of it, but many paint and pigment companies choose colors that they think will be hot in the coming year. Shades of green seem to be an overwhelming favorite for 2022, with almost every company choosing some green hue as either their top pick, or part of their overall range of choices. In fact, green is so well-represented this year that there’s really only one company that seems to be bucking the green trend entirely, but it’s a big one.

Pantone Color Institute, the company that actually manages color standards, broke from the pack with a significantly different choice for color of the year. Before we get to what that choice actually is, though, let’s take a moment to consider the rest of the color of the year choices from other companies. This will help you to appreciate just how big of a break with industry trends the Pantone choice really is.

Something in a Shade of Green

Usually, different paint companies offer up a pretty wide range of shades when it comes to choosing color of the year options. For 2022, however, there’s a pretty rare consensus among most of the big players in the industry that neutral shades of green are where it’s at. This isn’t just a couple of companies, either; take a look at some of these selections:

  • Benjamin Moore: October Mist, a light green with touches of grey and yellow

  • Sherwin-Williams: Evergreen Fog, a soft green close to olive

  • PPG: Olive Sprig, another soft green with a hint of yellow

  • Behr: Breezeway, a soft, light green

  • Dutch Boy: Cypress Garden, a somewhat stronger green

  • Glidden: Guacamole, another strong green with a hint of yellow undertone

Other popular companies such as Valspar and Dunn-Edwards offered up multiple color of the year choices, and green shades were included in the offerings of both.

Pantone’s Color of the Year

With green being so well represented by other companies, you might expect Pantone to have chosen something similar. That’s not the case, however, as Pantone’s selection for 2022 is a periwinkle blue offering known as Very Peri. It’s a pretty well-rounded periwinkle shade, falling in between blue and purple without being overwhelmingly either. Looking at it, it’s pretty easy to see why Pantone believes the color is really going to take off in the coming months.

According to Pantone, the color was chosen because of how well it reflects the changes that the world is currently going through. Pantone Executive Director Leatrice Eiseman stated that the classic blue color with violet-red undertones “displays a spritely, joyous attitude and dynamic presence that encourages courageous creativity and imaginative expression.” It’s a cool, calming color and could see use in just about any room in the home as well as the exterior.

Using These Choices in Your Home

Whether you’re going with one of the green options offered up by the paint companies or Pantone’s choice of Very Peri, there are a number of ways that you can use these colors in your home. They can be used as accents in bedrooms, living rooms, or kitchens, as door and shutter colors to accent your home, or even coatings for islands or other large wooden furniture pieces to really make them pop. They may need other colors or some strong woodgrains to add some warmth or contrast, but if you put in the work to find the right shades, then you’ll have color combos that will leave people talking.

Do More With Your Corner Cabinets

A good set of cabinets is all but essential in the kitchen. Not only do they keep your plates, bowls, and assorted other implements organized, but they can also provide easy access to dry goods and other items that you need to use frequently while cooking. The more cabinet space you have, the less clutter you’ll have in the kitchen itself, because you can store your various kitchen gadgets until they’re needed while still having them close at hand.

Corner cabinets can be a bit of a problem, however. While these cabinets tend to provide the most interior space, a lot of this space isn’t easy to access because of the narrow opening that the corner cabinet provides. Fortunately, this isn’t an issue that you just have to accept. There are a few different ways to address this problem so you can make better use of all that space without having to contort yourself in the process.

Install a Lazy Susan System

One of the most popular ways to make better use of corner cabinets is to install a multi-tiered Lazy Susan system inside the cabinet. You’ve likely seen one of these before as they’ve enjoyed significant popularity over the years. The assembly is made up of two or three large round platforms connected by a central spindle around which the platforms can easily rotate. You place items on the platform, turn it, then fill it up all the way around; when you need something, you simply turn the platform until it becomes available.

A lot of these systems use two platforms, one at the bottom of the cabinet and one near the center of the cabinet’s height. You may occasionally see Lazy Susan systems that have three platforms, however, or possibly different configurations as well. Keep in mind that there’s a trade-off as you add more platforms; while you have more storage space with each platform that’s added, the amount of vertical space you have available for your items decreases with each addition.

Add Pull-Out Shelving

Another option that’s increasingly popular is pull-out shelving. These shelves either pull out straight or rotate out from within the cabinet on tracks, letting you gain full access to the shelf’s contents and then slide it back into your cabinet space while done. Some may even feature complex sets of hinges and tracks to maximize the amount of shelf space that you can have in the cabinet; these setups typically have one shelf attached directly to the door and others being pulled along after it for easy access.

Regardless of the specific configuration of the shelves, the idea is to bring the shelves to you instead of making you reach into the cabinet to try and access items at the backs of the shelves. This makes using the entire space within your corner cabinet much more convenient, since the shelves can fill up that space when not in use, then be easily pulled out when you need them.

Revitalizing Your Cabinets

There are other ways that you can make use of corner cabinet space, including replacing your existing cabinets with new cabinets that have corner cabinets with an angled interior for easier access or a set of L-shaped drawers that make better use of the available space than a standard cabinet might. You might even consider eliminating the corner cabinets altogether and adding a floor-to-ceiling corner pantry instead. Depending on the layout of your kitchen, there may be other corner options available to you as well.

Organize Your Garage

Don’t wait for spring to do some deep cleaning. Winter is coming and fall is a great time to prepare your home against the harsh winter conditions and hazards it can bring. A clean garage will not only help you store outdoor items from the cold, wet weather but can provide insight into your home’s condition.

Here are a few great reasons why you should clean out your garage this weekend:

• Organize Things You Need – Over the year, some things may have been moved or covered up. Find the tools you’ll need this winter such as snow shovels, tire chains, and winter clothing.

• Make Room for Cars – Snow, wind, and rain can be hard on cars. Winter is time to bring them into a weather-controlled environment. Since you don’t want them in your living room, the garage makes perfect sense.

• Uncover Problems – Often the first sign of a leaky roof is found in the garage, where ceilings don’t cover it up. Look for water leaks and other signs of damage that you may not notice in a cluttered garage.

• Check for Pests – Check for signs of pests. Rat droppings and termite infestations can cause thousands of dollars of damage. Deal with any infestations quickly before the cold weather forces them deeper into the home.

• Find Extra Space for the Family – When the weather turns, outdoor activities are limited. Cleaning the garage could offer a nice indoor space for hobbies during the cold winter months.

Turn your garage from a dirty storage area into usable space this weekend. A few hours devoted to clearing and cleaning will be worth the trouble when the cold winter months arrive.

Is It Time for New Cabinets?

Cabinets play an important part in the functionality of your kitchen. Unfortunately, over time you might find that your cabinets no longer really meet your needs. This could be because they’re falling into disrepair, or it may be a result of you gradually needing more storage than your cabinets can provide. You might even realize that the decoration of your kitchen and surrounding rooms just don’t match your cabinets anymore. Regardless of the reason, it could be time to consider some new cabinets.

Have you actually reached the point where you need to get new cabinets, though? If you aren’t sure, spend a little time considering how well your cabinets truly meet your needs and what it is that you ideally want. Here are a few things to think about to help you make this decision.

Cabinet Condition and Function

One of the biggest considerations when it comes to deciding if it’s time for new cabinets is how well your current cabinets really fit your current life. Your biggest things to think about here are whether the condition of the cabinets is causing you problems, and how well the cabinets actually work for what you need them for. Start with the condition, looking for any damaged areas, doors that won’t close, warped shelves, and other physical problems that you encounter when using the cabinets. If these leave you unable to use some of your space or otherwise cause problems, it may be time to do something about it.

Likewise, if you have certain items that you can’t put in your cabinets because they won’t fit, or if there are parts of the cabinets that you can’t really use due to layout reasons, then you may have an issue with the functionality of your cabinets. Sometimes this isn’t a significant enough problem to replace your cabinets, of course. If using the cabinets is inconvenient or if you have a lot of wasted space, though, something clearly needs to be done.

Cabinet Aesthetics

Even though it’s not as pressing of an issue as damaged cabinets or cabinets that you can’t use fully, having cabinets that don’t match your other furnishings can also be an issue if you’re trying to tie your design choices together. Stop and think about how well your existing cabinets go with everything else, and even whether they are visually appealing in and of themselves. Your home is an investment, and if your cabinets are taking away from your enjoyment of that investment, then it might be time to replace them.

Replacing your cabinets for aesthetic reasons can be a standalone job, or it could be something that you do as part of a larger remodeling project. If you’re only replacing the cabinets, take the time to find a new cabinet option that fits in well with your kitchen layout and the dominant design elements within the kitchen. If you’re doing a larger kitchen remodel and have decided to get rid of your ugly cabinets as a part of it, stop and think about what you want in cabinets and then use that to inform some of your other remodeling decisions.

Do You Need New Cabinets?

Whether or not you need new cabinets is a big decision, but once you’ve weighed your options you should have something of an idea of whether your current cabinets will last you a bit longer. If you do find that you need new cabinets, then finding the right cabinet maker and installer is the next step in your cabinet journey. 

What Is a Vessel Sink?

When it comes to making changes to add a sense of fashion to your home, the bathroom is one of the most commonly overlooked rooms. There is a lot that can be done with the bathroom, though, including painting, adding accent decorations, and changing the various fixtures in the room to completely revamp its look. One option that’s increasingly popular with homeowners is replacing your old boring sink with a vessel sink.

While these sinks aren’t right for every bathroom and everyone’s sense of style, when they do work, they can really make a splash. If you’re not sure exactly what a vessel sink is or how one would fit into your bathroom’s decoration, read on. We’ll cover the basics of these sinks, how they differ from more traditional sinks, and how to tell if one is right for your home.

The Ins and Outs of Vessel Sinks

Most bathrooms are pretty basic when it comes to the layout of the sink: A basin is inserted into a countertop (and in many cases is an actual part of the countertop material), giving you a recessed area to wash your hands and do everything else that you need a sink for. They’re functional and usually more aesthetically pleasing than the metal sinks that are often seen in kitchens and utility areas. With that said, bathroom sinks don’t do much to stand out.

Vessel sinks serve the same purpose as a traditional basin sink but do so with a much more stylish flair. Instead of being a recessed sink built into the countertop, vessel sinks are made of a standing vessel or sculpted bowl that typically sits on top of the counter or only partially recessed into it. This creates a unique look for the sink that calls to mind a sense of nostalgia for more Victorian-era hardware. The faucet typically stands separate from the vessel and is either mounted to the counter or to the wall, adding to the overall look and highlighting the difference between vessel sinks and traditional basins.

Vessel Sink Installation

Compared to some other plumbing jobs, vessel sink installation can be a bit easier, but may also be easier to mess up if you aren’t careful. Provided that you aren’t installing a semi-recessed vessel sink, the main concerns for installing the sink are the installation of the faucet hardware and making sure that the drain hole in the countertop is the right size to line up with the vessel drain. Theoretically, one of these sinks can be installed by a single person who has a good idea of what they are doing.

With that said, there are still a few things that need to be kept in mind during installation. The counter will need to be sufficiently large to accommodate the vessel and faucet, and made of a material that’s sufficiently protected against water, as vessel sinks are more prone to splashing than more traditional sinks. You will also need enough vertical height to accommodate the sink; even a modest vessel sink can add 6 inches or more to the height of the sink area, so you’ll need the necessary clearance for both that and the faucet hardware. Mounting and sealing the sink are also more important than with traditional sinks, as the last thing you want is for your vessel to leak around its drain and potentially weaken the countertop below it.

Are Vessel Sinks Right for You?

Vessel sinks can be very striking, giving a unique look to your bathroom that really catches the eye. They come in a range of different shapes and materials, letting you customize your sink to meet your personal design preferences. They also don’t necessarily require as large of a counter or support structure as more traditional sinks, so they can work well in some smaller bathrooms provided they’re properly mounted. Vertical space and splash considerations may create issues, however.

Tips for Painting Over Dark Walls

Hooboy. You’ve finally bought a house, but the paint is so, so dark. “It’s only paint,” you told yourself as you walked through the place, and repeated at your walkthrough prior to closing. “It’s only paint.” And while it’s true that it’s only paint, and paint can always be painted over, going over dark walls is a much different story than trying to paint over light colored walls. Reds, purples, browns, and dark grays are particularly tricky, though anything with much pigment can pose a significant challenge if you’re not prepared. But don’t worry, we’ve put our best painting tips together to help you conquer your dark wall challenges.

Tip #1: Primer Is Not Optional

It can be easy to scoff at basic prep work when you’re “just painting,” but as with any project in your home, the end result is going to be directly related to how well you do the prep work ahead of time. And just like laying new tile or installing a new bathroom sink, the amount of preparation time you put into repainting your dark walls will show. The right prep also will make the job so much easier, so that’s something to look forward to.

When painting over dark walls, primer is absolutely not optional. Even if you choose a paint that claims to have a primer built in (it does not, it’s just a thicker paint), you will still need a high quality primer. This is not time to skimp on the cheap stuff. Choose a primer that’s designed specifically to block pigment bleeding. The greater the color difference between the paint that’s being covered and the paint you’re covering with, the more your primer will have to do. Plan to paint at least two coats of primer on very dark walls.

Tip #2: Choose Colors in the Same Family

If you like the color that your wall already is, but it’s just a shade or two too dark, well, that’s a much easier problem to solve than going from, say, midnight black to snowfall white. Taming the shade is a much easier proposition, since you’re staying in the same color family, and any small amount of pigment bleed may easily go unnoticed. However, you’ll still need to stay close to the same shade, or else you’ll need to go back to Tip 1 and prime like your life depends on it. You should still prime before you paint no matter what you do, but you may not need industrial strength primer to switch from a deep burgundy to a middling plum, for example.

Tip #3: Paint More Than You Think You Should

One of the biggest mistakes homeowners make when applying new wall paint, besides skipping the primer, is stopping before they’re done. With some colors, it can be a little tricky to tell if you’ve actually finished the job, but if you see any thin areas at all, you should really apply another coat. Chances are good that you didn’t just have one thin spot.

Two coats are often plenty of paint for a regular job, but don’t be shy about applying a third if it’s warranted, or going back later and adding another coat of paint after you’ve lived with it a while and noticed that the paint coverage isn’t really consistent. It’s easy to underpaint a wall, especially if you’re trying to get a job done over a weekend.

Top DIY Failures

The pandemic has had one unexpected result, a huge increase in home projects. From complete remodels to deferred maintenance projects, and everything in between, homeowners have taken advantage of their time at home by improving their property. Unfortunately, not all projects went as planned. Many homeowners bit off more than they could chew and became DIY failures.

During the last decade, the plethora of TV programs and DIY magazines have encouraged unskilled homeowners to attempt home improvements on their own. It looks easy enough to sledgehammer a wall or repave a backyard, but the truth is that few people have the aptitude to learn these skills over a long weekend. Add to this the shortage of contractor availability and in some cases, it was a recipe for disaster.

Of the main areas where DIY projects have failed, these are the worst failure rates:

• Bathroom–19.7%

• Kitchen-17%

• Yard/Landscaping-14.5%

• Bedroom-11.8%

The largest failure rate was replacing a plumbing fixture coming in at a whopping 13.6% failure rate followed by flooring at 10%. Even painting a room had a higher than expected failure rating; 7.5%.

Of course, there were some successes too: power-washing, changing filters, replacing a showerhead, garage projects, replacing doorknobs and cabinet pulls.

The pandemic has affected us all in different ways, but before you attempt a DIY project based on a 3-minute YouTube video, remember that it may cost you far less to hire a professional.

Design Trends You'll See This Year

Interior design has a fresh look! After years of subtle trend changes, this year style gets a complete makeover. Spaces are being lightened, softened, and eclectic merging of styles encouraged. If you’re ready for a change, the good news is almost anything goes. Find the trend that suits you and experiment with new textures, colors, and styles.

10 Design Trends to Try This Year

1. Home Office – Not surprisingly, homeowners are carving out specified office and workspace.

2. Separated Rooms – The open floorplans are not exactly gone, but new designs are separating spaces into separate areas.

3. Houseplants and Indoor Gardens – Herb gardens and houseplants offer a soothing, natural environment.

4. Rattan – Natural materials are having a huge moment and rattan furniture and accents are everywhere.

5. Wood Grain – Furniture and cabinets with strong wood grain warm up living and kitchen areas.

6. Playgrounds – Backyard playgrounds have been taken to the next level; offering private places for the kids to play.

7. Dark and Cool Patios – Grays and blacks are showing up in patio furniture, paint colors, and hardscapes.

8. Smart Bathrooms – Touchless faucets, Alexa-enabled showerheads, self-cleaning toilets, and more.

9. Retro Style – Nostalgic styles and colors are prevalent this year. Bold palates and updated retro furniture are fresh again.

10. Soft and Cozy – Layers of pillows, throws, and area rugs create an inviting room.

More than ever, home is a refuge. Now is the time to build a personal design that suits your lifestyle and theme. With eclectic options to suit any taste, home design has a fresh look.

Concrete Landscaping Ideas for Front Yard

Concrete was once a not so attractive alternative to a more expensive landscaping hardscape. Modern techniques have brought this versatile material back in vogue. While still an affordable alternative, concrete can add excitement to your front yard while still maintaining the low-maintenance advantage it’s always had.

Fresh Concrete Ideas for Your Front Yard

• Concrete Walkways – Because concrete is poured wet, it can take any shape you like. Adding color, stain, or texture can add interest to any front walkway.

• Stamped Concrete – Stamped concrete can take any form. Consider a geometric pattern or create a focal point like a compass or sun. Embed colorful tiles to add further interest.

• Retaining Walls and Flower Beds – Build dimension in your yard by adding solid concrete walls and edging. Use stamped techniques or add siding or paint to increase the style.

• Entrance Arch or Courtyard – If space allows, add visual impact and privacy with a private courtyard. Face concrete walls with flagstone, limestone, or wood for an additional spark.

• Add Lighting – Pathway lighting gets an upgrade when embedded with a concrete walkway. Guide guests to your front door safely with this soft lighting option.

The choices are endless. Landscape architects are using concrete more and more in their designs. With its versatility and affordability, concrete can be a great addition to any front yard style.

Organize Your Garage

Don’t wait for spring to do some deep cleaning. Winter is coming and fall is a great time to prepare your home against the harsh winter conditions and hazards it can bring. A clean garage will not only help you store outdoor items from the cold, wet weather but can provide insight into your home’s condition. Here are a few great reasons why you should clean out your garage this weekend:

• Organize Things You Need – Over the year, some things may have been moved or covered up. Find the tools you’ll need this winter such as snow shovels, tire chains, and winter clothing.

• Make Room for Cars – Snow, wind, and rain can be hard on cars. Winter is time to bring them into a weather-controlled environment. Since you don’t want them in your living room, the garage makes perfect sense.

• Uncover Problems – Often the first sign of a leaky roof is found in the garage, where ceilings don’t cover it up. Look for water leaks and other signs of damage that you may not notice in a cluttered garage.

• Check for Pests – Check for signs of pests. Rat droppings and termite infestations can cause thousands of dollars of damage. Deal with any infestations quickly before the cold weather forces them deeper into the home.

• Find Extra Space for the Family – When the weather turns, outdoor activities are limited. Cleaning the garage could offer a nice indoor space for hobbies during the cold winter months. Turn your garage from a dirty storage area into usable space this weekend. A few hours devoted to clearing and cleaning will be worth the trouble when the cold winter months arrive.

Fall and Holiday Décor Listing Tips


If you have your home on the market, it’s natural to want to create the perfect environment for potential homebuyers. This includes not only professional staging services but also time-honored tips like freshly baked treats and seasonal décor. As we transition from summer to the holiday season, however, it’s interesting to note that fall decorating is the least appreciated by home visitors. The cinnamon scents and pumpkin-everything that greets the senses in stores and coffee shops can be overwhelming in a home environment. You may enjoy a nice cookie-dough candle, but many people don’t agree. A tasteful, welcoming fall wreath on the front door is fine, but in general, fall is a time best ignored by home sellers. The holiday season can bring family challenges as well. When your house is on the market, this is not the time to continue the tradition of the neighborhood Haunted House with cobwebs hanging from every gutter. Far better to place a strategic jack-o-lantern or tasteful pumpkin pile. Talk about these kinds of changes in advance with younger children who may not understand the need to keep the house fully accessible and de-personalized. Having your home listed for sale is a special time and requires some sacrifice. The holiday season can bring more emotional challenges as well. A sense of nostalgia is only accentuated by the lack of family traditional décor. Consider carefully what to include and exclude. Scale back the unnecessary decorating extras and concentrate on the special few items. In this way, you can still celebrate your family traditions while appealing to homebuyers looking for their own place to call home.